


Autumn check-up: How to get your mountain bike ready for winter – 10 must-dos!
Josh Welz
· 18.10.2026

In this article, we use so-called affiliate links. With every purchase through these links, we receive a commission from the merchant. All relevant referral links are marked with . Learn more.
The last ride is over; my shoes are out in the hall to dry. I’ve booked the gym, and the trainer is ready and waiting in the cellar. You’d think things would calm down now. But this is exactly where the work begins that makes all the difference in the spring: between a quick start on your local loop and a first weekend spent on the bike stand instead of out on the trail.
An autumn service is more than just a particularly thorough clean. It provides an opportunity to check the condition of the whole bike, replace worn parts in good time and inspect areas that are easily overlooked during the season. If you store your bike clean and dry, look after the chain and don’t forget the tyres and bearings, you’ll be well prepared for the winter break.
The key point is this: not everything that can be unscrewed needs to be taken apart. It is crucial to proceed systematically and to distinguish between maintenance, inspection and repair. Work on brakes, the chassis and safety-critical connections requires the right knowledge, suitable tools and adherence to the relevant manufacturer’s specifications. If in doubt, take it to a specialist workshop. The following checklist guides you through the autumn service in a logical order: first clean, then check, next service, and finally store the bike correctly.

1. Clean thoroughly, then dry completely
What to do: First, remove any coarse dirt using a low-pressure water jet. After that, a suitable bike cleaner (You can find bike cleaners for your bike here) soft brushes and a sponge. Work from top to bottom, paying particular attention to the underside of the down tube, the area around the bottom bracket and the rear suspension joints. Use a separate brush for the greasy drivetrain. This way, you won’t spread the dirt all over the bike. Rinse off the cleaning solution and dry the bike with clean cloths.
Why it is important: Damage and leaks are easier to spot on a clean bike. Avoid using a steam cleaner on bearings, seals and electrical connections. Aggressive cleaning can force water into precisely those places where you don’t want it before the winter break.
2. Check the frame, fittings and bolted joints
What to do: Next, carry out a visual inspection in good light. Check the frame, welds and joints, dropouts and shock mounts for any noticeable changes. Also check the handlebars, stem, cranks and seat stays. Scratches deserve particular attention.
You shouldn’t tighten screws across the board ‘just to be on the safe side’. Check the relevant connections using a suitable torque wrench in accordance with the specifications for the relevant component. The assembly instructions also cover any prescribed assembly paste, lubrication or threadlocker. If you suspect a crack or notice any obvious damage, this is a job for a specialist workshop, not for an improvised repair.
Why it is important: The autumn service is the ideal time to identify any damage that has gone undetected so far. A freshly cleaned bike is by no means a bike in perfect working order. When it comes to safety-critical components in particular, it is a thorough inspection that counts, not how it looks.
3. Measure chain wear and assess the drive system
What to do: Check the cleaned chain using a wear gauge suitable for the drive. The manufacturer’s replacement limit is crucial and the correct use of the measuring tool. For many modern drivetrains, even an elongation of around 0.5 per cent is significant. However, this figure is not a universal guideline for every chain.
Next, check the thoroughly cleaned cassette, chainring and derailleur pulleys for damage and any noticeable wear. Not every unusual tooth shape is a defect: derailleur guides are deliberately designed to vary in shape. If a new chain jumps over individual sprockets under load, the cassette may also be worn. Whether components need replacing is therefore determined not only by a visual inspection, but also by how they function.
Why it is important: Replacing a chain in good time can prevent the rest of the drivetrain from suffering unnecessary wear and tear. However, replacing the entire drivetrain on a hunch makes just as little sense as continuing to ride with a chain that is clearly past its best.
4. Lubricate the chain with oil or a clean, prepared wax system
What to do: Are you sticking with Chain oil, clean and dry the chain, then lubricate it in the right places. Wipe off any excess oil from the outside. The chain needs lubrication at its moving contact points, not a thick layer of grime on the outer links.
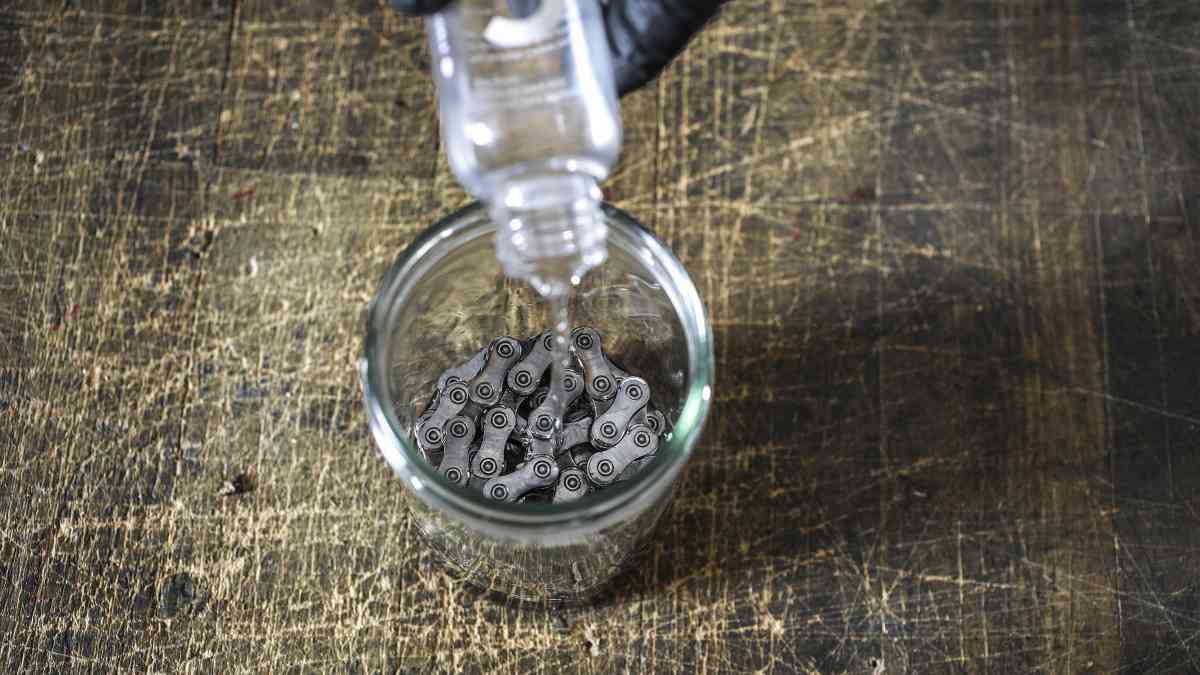
The winter break is also a good opportunity to switch to wax. Waxed chains are easier to maintain in the long run, as dirt does not stick to them as much. To achieve this, old lubricants and residues must be thoroughly removed. There are suitable products available on the market, such as standard drivetrain degreasers or specialist cleaners (Silca Chain Stripper, etc.). As a second step, you can also treat the chain with denatured alcohol to remove any remaining traces of dirt and grease. The chain must be completely dry before any further treatment. Whether it’s hot wax or liquid chain wax: Follow the preparation, application and, where applicable, drying instructions for the system in question. You must not simply apply wax to a chain that has already been oiled!
Why it is important: A well-maintained chain should not be left dirty or unprotected whilst the bike is not in use, in order to prevent rust and corrosion. However, wax is not a guarantee against rust: after riding in wet conditions, even a waxed chain must be allowed to dry and, if necessary, treated again. The main advantage of waxed chains is that dirt sticks to them less easily.
5. Check the brake pads and brake discs
What to do: Check the remaining tread depth. To check this accurately The linings must be removed. The key factor is the wear limit of your brakes, which can vary from one manufacturer to another. If the wear level falls below the specified limit, replace the brake pads.
The brake discs must also be checked for wear. Compare the result with the minimum thickness specified by the manufacturer. Also check the brake hoses and connections for damage or fluid leaks. If the brake pedal feel is unclear or braking performance is deteriorating, a professional diagnosis is required. New brake pads must then be bed in according to the manufacturer’s instructions.
Why it is important: A brake that’s just about still working isn’t automatically ready for the next season. Always keep oil, wax and maintenance sprays well away from the brake pads and friction surfaces. And when the wheel is removed, don’t pull the brake lever without using a suitable spacer.
6. Check the tax rate and update it if necessary
What to do: Apply the front brake and gently rock the bike forwards and backwards. As you do so, feel directly at the junction between the frame and the headset to check for any play. Noises alone are not sufficient for a diagnosis. Next, lift the front wheel and move the handlebars slowly: the steering should be smooth and free of friction.
If it is dirty or does not run smoothly it may be advisable to dismantle it . Anyone who has mastered this task should clean the accessible areas and treat the designated contact and sealing surfaces in accordance with the manufacturer’s instructions. Sealed bearings must not be opened indiscriminately or flooded with cleaning fluid. Rough or corroded bearings must be replaced if necessary. When fitting, the following applies: first adjust the bearing play correctly, then tighten the stem in accordance with the instructions.
Why it is important: Adjusting the headset too tightly is not a solution to play caused by a fault. The bearings will wear out even more quickly and may damage other parts.
7. Check the bottom bracket, hubs and rear triangle for play
What to do: Hold the cranks and carefully check for any sideways play. Turn them and watch out for any unusual resistance or rough running. Depending on the drivetrain, however, the chain, seals and freewheel may also affect how it feels. You may need to remove the chain to get a clearer idea. Not all bottom brackets are the same: Adjustability, maintenance and replacement vary depending on the design.
Check the wheels for lateral play and, on a full-suspension bike, inspect the rear suspension joints. Make sure you distinguish between a loose connection and a worn bearing. Neither should be ‘repaired’ by simply tightening them indiscriminately. Rear suspension bearings can be replaced by experienced cyclists themselves, but if in doubt, they should be taken to a specialist workshop. In any case, the torque settings and fitting instructions specified by the manufacturer must be followed.
Why it is important: Saddle problems don’t just disappear over the winter break. If you have any unusual gait or riding issues checked out now, you’ll avoid the first spring ride turning into a troubleshooting exercise.
8. Servicing the suspension fork, shock absorber and dropper post
What to do: Clean the standpipes or sliding surfaces and the areas around the dust wiper blades with a soft, clean cloth. Check for scratches, noticeable oil leaks and malfunctions. Then compare the number of operating hours with the service intervals for your model. Separate specifications apply to the Vario strut, which you should also check.
A service that is due cannot be replaced by a quick clean. Depending on the component, various tasks may be required, ranging from minor lubrication and seal checks to more extensive maintenance. Use only approved operating fluids and care products. Applying random sprays to the seals is no substitute for the prescribed maintenance. As servicing at the manufacturer’s or in a specialist workshop can sometimes involve long waiting times, the winter break is definitely the ideal time to carry out this maintenance work!
Why it is important: Chassis maintenance is not based solely on calendar years. Usage, conditions and operating hours are all important factors. Anyone who has already reached a service interval should not put off the service until the start of the season.
9. Check the wheels, tyres and tubeless system
What to do: Turn both wheels and check for lateral or radial runout. Inspect the rims for damage and the tyres for cuts, damaged sidewalls and worn tread. With a bit of experience, you can true the wheels yourself. Depending on the design, you can also replace individual spokes yourself. Damaged rims – such as those with dents, nicks or cracks – should be taken to a specialist workshop or sent to the manufacturer.
With tubeless tyres, sealant is a must-have on your checklist. Check, in accordance with the instructions for the product you’re using, whether there is still enough effective sealant left. It doesn’t last indefinitely: Schwalbe, for example, states that Doc Blue remains effective for around two to seven months, depending on the conditions. If necessary, remove any loose, dried-out residue and sort out any stuck valves. However, you can also wait until spring to top up with fresh sealant.
Why it is important: Tyres should not be left permanently flat under the weight of the bike whilst in storage. Check the pressure from time to time or relieve the pressure on the wheels by using a suitable suspension system. A cool, dry and dark storage area is best for tyres.
10. Store in a dry place and look after your e-MTB battery properly
What to do: Store your fully dried bike in a dry, sheltered place. A damp corner is not a good place to store it over winter. Before putting it away, make a note of any work that’s been done and any outstanding issues. That way, the next season won’t start with you guessing which parts actually still need replacing (keyword: fresh sealant).
When it comes to e-MTBs The drive manufacturer’s storage instructions also apply. For example, Bosch recommends a battery charge level of between 30 and 60 per cent for long-term storage, as well as a dry storage location at room temperature. Check the charge level occasionally whilst the battery is in storage and top it up if necessary. Batteries must not be stored for long periods in a fully charged or fully discharged state.
Why it is important: Proper storage conditions are part and parcel of bike maintenance. Nevertheless, a quick functional check is essential before your first ride: check tyre pressure, brakes, wheel alignment and look for any obvious damage. The aim of the autumn check isn’t so that you can set off straight away in the spring on an untested bike, but rather so that you don’t have to work through a list of repairs before your first ride.

Josh Welz
Editor-in-Chief