


Squeaking, creaking, cracking, clattering, rattling: Analysing noises on a bicycle
Josh Welz
· 12.08.2026

Our conclusion: take a methodical approach!
Noises on a mountain bike can usually be attributed to friction, play, dirt or a loose connection. It is crucial to carry out a systematic check, carefully observing what triggers the noise. Pedalling, suspension, steering and braking each point to different potential causes. However, loose brake discs, cracks, excessive bearing play and e-bike motor noises require particular caution and, where necessary, professional assistance.
A bike that rattles, creaks, groans, cracks or clatters isn’t necessarily faulty. Many noises are caused by normal movement between components: a seat post moves within the seat tube, cables knock against the inside of the frame, bearings move under load, or a brake disc vibrates in its mount. Nevertheless, no unusual noise should be ignored indefinitely. Dirt, insufficient torque and incipient wear can develop into a more serious problem over time. Furthermore, cracks, loose brake pads or play in safety-critical components pose an immediate risk of a fall.
Troubleshooting therefore doesn’t start with a spanner, but with an observation: when does the noise occur? Only when pedalling, only when standing on the pedals, when the suspension compresses, when steering, when braking, or even when riding over small bumps? Does it change when you’re sitting or standing up? Does it only occur under heavy load, only in wet conditions, or only after a long descent?
The bike is then broken down into as many individual movements as possible. First, you should check the bike whilst it is stationary. The front and rear wheels can be dropped separately onto the ground from a height of a few centimetres. This often allows you to roughly pinpoint any loose parts in the frame, rattling cables and loose fittings. We also recommend categorising noises into two groups to begin with: they are caused either by suspension movement or by pedalling. You should then work your way through the bike from the rear to the front.

It is important to address only one potential cause at a time. If you grease the bottom bracket, adjust the headset and remove the seatpost all at once, you won’t know afterwards which of these measures was successful. For carbon components, brakes, suspension and e-bike drives, the manufacturer’s specifications apply. A torque wrench is not a luxury item here, but an essential diagnostic and safety tool.
1. A cracking sound when pedalling
Noise
A single clicking sound occurs with every turn of the crankset or whenever the pedals are pressed down hard. The noise is often attributed to the bottom bracket. In fact, however, there are numerous potential contact points in the drivetrain that could be causing it.
Analysis
Firstly, you should check whether the noise also occurs when riding whilst standing. If it stops, the saddle and seat post are the most likely culprits. If it persists, check the pedals, cranks, chainrings, bottom bracket, cassette and rear wheel in turn.
On the assembly stand, the crank can be turned slowly. A noise that occurs once per revolution is more likely to be caused by the crank, chainring or pedal. Irregular clicking under heavy load, on the other hand, may be caused by a clamp connection or a bearing. We recommend starting with short test rides, each time changing only one load factor at a time.
Cause
- Loose or dry pedal threads
- Play between the pedal axle and the pedal body
- Loose chainring bolts
- Incorrectly fitted crank
- Dirty or worn bottom brackets
- Movement of a press-fit bottom bracket within the frame
- Loose cassette lock nut
- Dry or damaged chain links
- Worn-out selector rollers
- Loose thru-axle or loose rear wheel mounting
- A creaking noise coming from the contact points between the hub, the frame and the rear triangle
Pedals are an often-overlooked source of noise, as they contain threads, bearings, axles and crank mounts all packed together in a confined space.
Resolution
Remove the pedals, clean the threads, apply a little grease and refit them, tightening them by hand. Check the chainring bolts in a criss-cross pattern. Retighten the crank and bottom bracket in accordance with the relevant fitting instructions. A threaded bottom bracket can be cleaned, greased and screwed in correctly. With a press-fit system, the bearing seat and adapter must be checked. If there is play or an incorrect fit, a workshop repair using a suitable assembly or locking paste is often required.
A dry chain should be treated with a suitable chain oil. Damaged chains, bearings or derailleur pulleys should be replaced. You should never simply ‘force’ a creaking noise in the drivetrain away by applying ever-increasing torque. This can damage overloaded carbon or aluminium components.
2. A cracking sound whilst pedalling out of the saddle
Noise
The creaking sound only occurs when the rider stands up from the saddle and moves the bike vigorously from left to right. When seated, it is barely audible, if at all.
Analysis
Apply pressure to the handlebars whilst the bike is stationary. To do this, apply pressure alternately to the left and right sides of the handlebars. If the noise gets louder, focus your attention on the handlebars, stem, steerer tube and headset. Then apply lateral pressure to the rear wheel and check the thru-axle.
Cause
- Dry contact surfaces between the handlebars and the stem
- Torque on the stem clamp is too low or too high
- Dirty spacers or headset cover
- Play in the headset
- Movement between the steerer tube and the stem
- Loose thru-axle
- Play in the rear wheel hub or rear triangle
- A creaking frame joint or damaged carbon fibre
With carbon handlebars in particular, you must not simply tighten the clamps any further. For carbon components, it is advisable to use a suitable assembly paste, and it is essential to adhere to the manufacturer’s torque specifications.
Resolution
Clean the clamping surfaces, use assembly paste suitable for the material, and tighten the bolts evenly in a cross-pattern. Set the headset preload correctly, then tighten the side stem bolts to the correct torque.
If the noise persists or if there are any cracks, dents or unusual deformations visible, the bicycle must not be ridden any further. A professional inspection is required, particularly of the handlebars, stem, steerer tube and frame.
3. A creaking noise when turning the steering wheel
Noise
When turning the handlebars, there is a dry creaking or grinding noise. Sometimes the noise can also be heard when braking with the front brake applied.
Analysis
Apply the front brake and move the bike gently forwards and backwards. There should be no noticeable play between the frame and the fork. Then slowly turn the handlebars from one stop to the other. If the noise moves with the steering movement, the headset, spacers, bearing cover or cable routing are likely to be the cause.
Cause
- Loose headset
- Dry or dirty headset bearings
- Shrunken bearings
- Friction spacers
- Squeaky headset cover
- Brake lines or gear cables at the stops
- Internal cables that knock against the frame when steering
- Pipes that are too narrow or incorrectly routed
Resolution
Remove the headset, clean the bearings and contact surfaces, apply a thin layer of grease and then adjust correctly. Damaged bearings must be replaced. Cable stops can be treated with a suitable silicone spray. Foam sleeves are useful for internally routed cables. Depending on the design, some cables may need to be partially removed for this. Another option is to use brush solutions, which can be used to stabilise cables within the frame at a later stage. To do this, a special frame brush is inserted into the frame tube through a larger opening, such as the head tube, seat tube or, on e-mountain bikes, the battery compartment. Their soft bristles spread out and stabilise the cables inside the frame. In most cases, the cables do not need to be removed for this. If there is no opening large enough, foam sleeves are the better solution.
4. Squeaking from the saddle or seat post
Noise
The clicking noise occurs mainly when sitting, often when pedalling vigorously or when riding over uneven surfaces. It can also occur when the rider shifts their weight on the saddle.
Analysis
First, whilst stationary, press down on the saddle and apply pressure to the sides. If the noise disappears when you stand up on the pedals, the cause is most likely to be found in the area of the saddle, seat post or seat tube.
Cause
- Dry saddle clamping
- Dirt between the saddle frame and the clamping jaws
- Loose terminal screws
- Movement between the seat post and the seat tube
- Incorrect assembly paste
- The seatpost is set too low
- Play in the seatpost mechanism
- Loose connection between the saddle frame and the saddle body
- Crack in the saddle frame or saddle shell
Mountain bikes, in particular, are exposed to heavy dirt and water in this area. The strain is further increased by frequent shifts in weight.
Resolution
Remove the saddle, check the saddle frame and saddle shell for cracks, clean the clamping surfaces and tighten the bolts to the specified torque. Remove the seat post and clean the seat tube thoroughly. Assembly grease may be suitable for aluminium seat posts, whilst carbon assembly paste is generally used for carbon seat posts. The manufacturer’s specifications are decisive.
A Vario seatpost must not simply be treated with just any oil. Maintenance is required if there is play, a leak or noises coming from inside.
5. Creaking when the suspension compresses
Noise
The noise occurs when the rear suspension or fork compresses, and often also whilst stationary when the bike is pressed down firmly.
Analysis
First, check whether the noise is coming only from the rear suspension, only from the fork, or from both suspension systems. Slowly compress the suspension whilst observing the individual bearings, pivot levers and fixing bolts.
Cause
- Dirty or dry plain bearings
- Worn bearings in the rear triangle
- Loose bearing shaft
- Dry sockets
- Seals subject to friction
- Loose shock absorber mounting
- Damaged fork or shock absorber seals
- Contact between the cable, frame and rear triangle
Resolution
Clean the outside of the joints and check for any visible play. Bearings must not be hosed down with a high-pressure washer. If there is any play, rust or rough running, the bearings must be removed and replaced. Shock absorber and fork maintenance must be carried out in accordance with the manufacturer’s service schedule.
Not every creak should be treated with oil. Seals and bearings require different lubricants. Using the wrong product can damage rubber or trap dirt.
6. Rattling from the frame and cables
Noise
On cobblestones, over tree roots or when the bike is dropped onto its tyres, there’s a clattering and rattling noise coming from the frame. Sometimes the noise only occurs when steering.
Analysis
Drop the front and rear wheels separately onto the ground from a height of a few centimetres. Then shake the bike and move the handlebars. Check loose bottle cages, mudguards (if fitted), spoke magnets, cables and thru-axles individually.
Cause
- Brake lines routed internally
- Loose gear cables or wires
- Cables not secured in the down tube
- Loose battery or motor cables on an e-mountain bike
- Loose bottle holders
- Removable battery cover
- Loose mudguard or luggage rack mounting
- Loose speed sensor or magnet
- Loose thru-axle
Resolution
Cables are secured using foam sleeves, suitable frame guides or cable ties. Care must be taken to ensure that the cable is not kinked and that it has sufficient freedom of movement to allow for steering, suspension and installation and removal.
On an e-mountain bike, the battery, battery mount, cover, charging socket and motor cable must be checked. To do this, switch off the battery and remove it in accordance with the manufacturer’s instructions. Work on high-voltage or system components must be carried out by a specialist workshop.
7. A rattling or clinking noise from the brakes
Noise
A metallic clattering noise occurs when driving over uneven surfaces. The noise may disappear or change when braking. A rhythmic clinking noise may also be heard when the wheel is turning.
Analysis
Turn the wheel and inspect the brake from the outside. Check the brake disc, caliper, pads, pad split pin and retaining clip. Then check that all the brake disc and caliper fixings are secure.
A rattling noise can also be caused by a loose bolt on the brake disc. The disc must then be checked immediately. SRAM warns against riding with loose rotor, clamp or brake calliper bolts.
Cause
- Loose brake disc bolt
- Loose Centre-Lock locking nut
- Play in the brake pads
- Missing tyre pin
- Loose brake caliper mounting
- Warped brake disc
- Dirty floor coverings
- Play in the hub
Resolution
Check that the brake disc bolts are tightened to the specified torque. With a six-hole mounting, bolts are usually tightened in a criss-cross pattern. SRAM specifies 6.2 newton-metres for certain MTB rotors, whilst Shimano specifies, for example, 2 to 4 newton-metres depending on the system. The manufacturer’s specifications always take precedence.
Damaged bolts, retaining rings or brake discs must be replaced. A warped disc must not simply be bent back into shape by force if this could damage the braking surface. After any work on the brakes, check that the disc rotates freely and that the brake caliper is correctly seated.
8. Squeaking or grinding noises when braking
Noise
The brakes squeak, screech or grind when decelerating. The noise may only occur in wet conditions, after a long descent, or at very low speeds.
Analysis
First, make a distinction: if the noise only occurs in wet conditions, it may be normal for the time being. If it persists in dry conditions or if braking performance changes, the brake pads and brake disc must be checked.
Cause
- Water or mud on the braking surface
- Brake pads contaminated with oil
- Glazed surfaces
- New tyres that haven’t been run in
- Loose brake disc
- Wobbling brake disc
- Worn brake disc
Resolution
Clean the brake discs using a suitable brake cleaner or isopropyl alcohol. Oily brake pads cannot usually be reliably salvaged by sanding them down with sandpaper, as the oil usually penetrates into deeper layers. As a general rule, they must be replaced. New pads and discs must be bed in according to the manufacturer’s instructions.
9. Rattling and creaking noises from the wheels
Noise
The bike makes a creaking noise, the spokes rattle, or there’s a steady clattering sound. The noise may occur when pedalling, braking or simply when riding over uneven surfaces.
Analysis
Remove the wheel and turn it slowly. Check for lateral runout, vertical runout and damaged spokes. Gently squeeze together two adjacent spokes at a time and compare their tension. Also check the hub bearings, thru-axle and freehub.
Cause
- Uneven or insufficient spoke tension
- Loose spoke junctions
- Damaged spokes
- Play in the hub bearing
- Loose thru-axle
- Loose fastening of the freewheel body
- Loose cassette lock nut
- Crack in the rim or hub flange
- The inner tube or tubeless valve is rubbing against the rim
Resolution
Loose spokes must be retensioned correctly. A damaged spoke must be replaced and the wheel then trued. Bearings with play must be adjusted or replaced. Thru-axles and cassette locknuts must be tightened in accordance with the manufacturer’s instructions. Check that the valve is seated correctly. Cracks in the rim, hub or spoke hole are a reason not to continue using the wheel.
10. Cracking noises from the frame, rear triangle or fork
Noise
The noise is difficult to pinpoint and occurs under heavy loads or on uneven surfaces. With carbon frames, it may be perceived as a crackling, cracking or dry grinding sound.
Analysis
The frame, rear triangle, fork and fittings are inspected under good lighting conditions for cracks, changes to the paintwork and dents. The bicycle is checked not only visually but also for play. Checking for noise by dropping the bike from a low height may provide some indication, but is no substitute for a safety check.
Cause
- Loose frame or rear triangle bolts
- Moving bearing mounts
- Crack in the carbon or aluminium
- Removal of an adhesive bond
- Damaged fork crown
- Crack in the area of the damper mounting
- Loose bottle cage or chain guide mounting
Resolution
Any loose components must be tightened to the correct torque. If you suspect damage to the frame or fork, do not continue riding the bicycle. A professional inspection by the manufacturer, a dealer or an accredited testing laboratory is required. Cracking noises may indicate structural damage!
11. Noises on an e-mountain bike
Noise
The noise only occurs when the engine is running, only when using pedal assistance, or at a high cadence. Possible noises include cracking, grinding, whirring, rattling or a periodic knocking sound.
Analysis
Firstly, a distinction is made between motor-assisted and non-motorised operation. To do this, switch off the motor and ride the bike without assistance. If the noise disappears when the motor is not running, the motor, chainring mount, cranks, battery and motor protection should be checked more thoroughly.
Cause
- Loose or worn engine mounting bolt
- Play in the engine mount
- Wear and tear on the bearings or drive unit
- Loose crank
- Loose chainring mount
- Play in the motor pinion or the freewheel mechanism
- Loose battery in the compartment
- Rattling battery cover
- Loose engine cables or connectors
- Loose engine guard
- Noise coming from the gearbox or the engine mounts
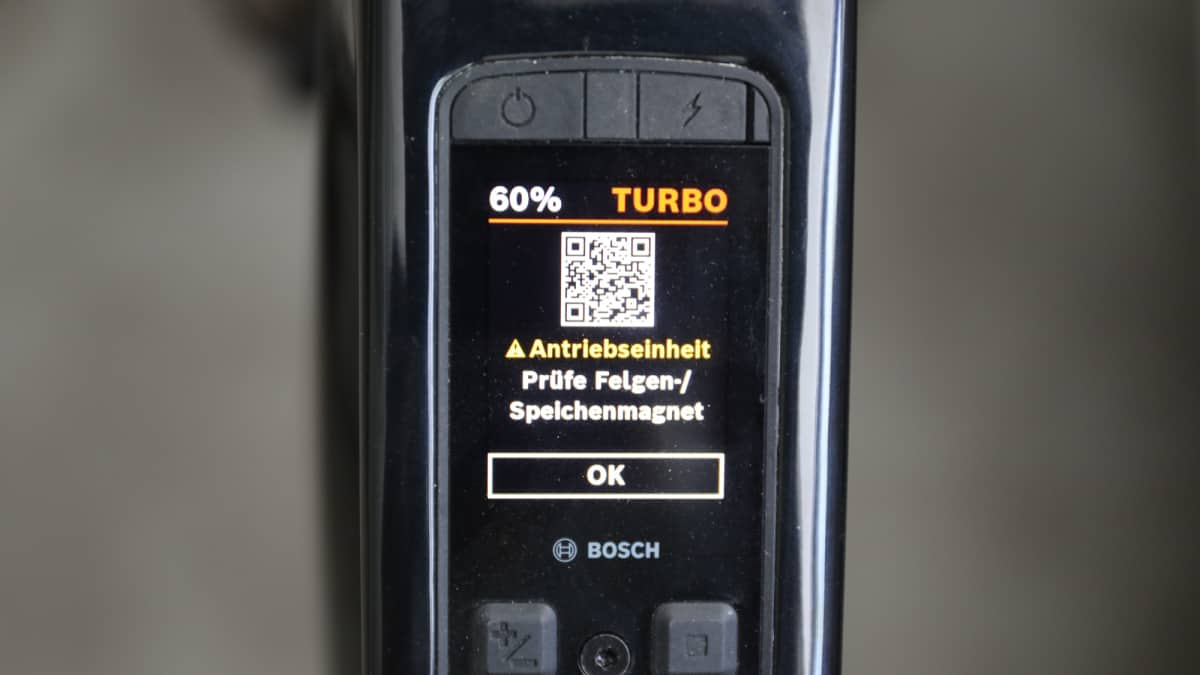
Unfortunately, engine noise – including rattling – is common in some engine models due to their design. With such engines, it is important to check whether the engine noise or rattling is getting louder. In such cases, these noises should not simply be dismissed as ‘typical of e-bikes’.
Resolution
Check the screws and retaining clips. Inspect the battery compartment, cover, sensor, motor guard and any visible fixings, and secure them in accordance with the instructions. If a rattling battery cover cannot be secured more effectively, you can pad the loose cover at its contact points with thin, non-conductive damping material. Do not open the motor itself! In the event of grinding noises, increasing play, recurring error messages, loss of performance or noises under load, an authorised specialist workshop must be consulted.
With e-mountain bikes, the higher overall weight of the system must also be taken into account. This puts greater strain on the wheels, brakes, tyres, thru-axles and rear suspension. A noise that seems harmless on a lightweight mountain bike may be a quicker indication of wear and tear on an e-mountain bike.
12. Noises from the gears and chain
Noise
The chain rattles, the gears creak when you change them, or the rear derailleur clatters on rough terrain.
Analysis
First, check whether the noise occurs only whilst changing gears or continuously. Then check the chain, cassette, derailleur pulleys, derailleur hanger and outer casings. Turn the chain backwards to identify any stiff or damaged links.
Cause
- A dry or damaged chain
- Stiff chain link
- Worn chain and cassette
- Incorrectly adjusted gearbox
- Loose switch rollers
- Bent derailleur hanger
- Loose cassette lock nut
- Loose or rattling chain guide
- Dry joints on the rear derailleur
- Insufficient tension in the rear derailleur cage
Resolution
Clean, lubricate and check the chain for damage. Stiff links should be loosened or the chain replaced. The rear derailleur and derailleur hanger must be correctly adjusted. Loose links must only be treated with a suitable lubricant. If the chain or cassette is damaged, replacing it is safer than carrying out a temporary repair.
A seven-step systematic diagnostic plan
- Describe the sound: Cracking, creaking, crunching, clattering, squeaking or grinding.
- Identify the trigger: Braking, steering, suspension, gear changes or bumps.
- Change the load: Sitting, standing on the pedals, applying pressure to the front or rear wheel only.
- Checking the bike whilst stationary: Adjust the handlebars, saddle, cranks, wheels and rear triangle individually.
- Work from the rear towards the front: Rear wheel, drivetrain, saddle, rear triangle, frame, cockpit and fork.
- Carry out just one action: Clean, lubricate, adjust or replace the component.
- Complete the security check: Check the brakes, handlebars, stem, fork, frame and thru-axles.
The DIY diagnosis comes to an end in the event of cracks, excessive bearing play, motor or battery faults, or damaged carbon components. In such cases, you’ll need to take it to a specialist workshop.

Josh Welz
Editor-in-Chief